
Shopify theme development has a very good theme editor in the Shopify Admin – easy to work. But as developers, we also prefer to work on localhost within our favorite IDE. One core benefit is you work with your team on this Shopify Theme Kit development by integrating workflow tools like Git.
Let’s take a look at the process and tools you will use to start building Shopify Themes locally. You’ll need to know the basics of the command line.
Command-line resource:
- Video tutorials
- Codecademy
We’ll follow only 3 steps to get started:
- Install Theme Kit
- Setting up API credentials
- Push updates to your theme
Install Shopify Theme Development
Step 2
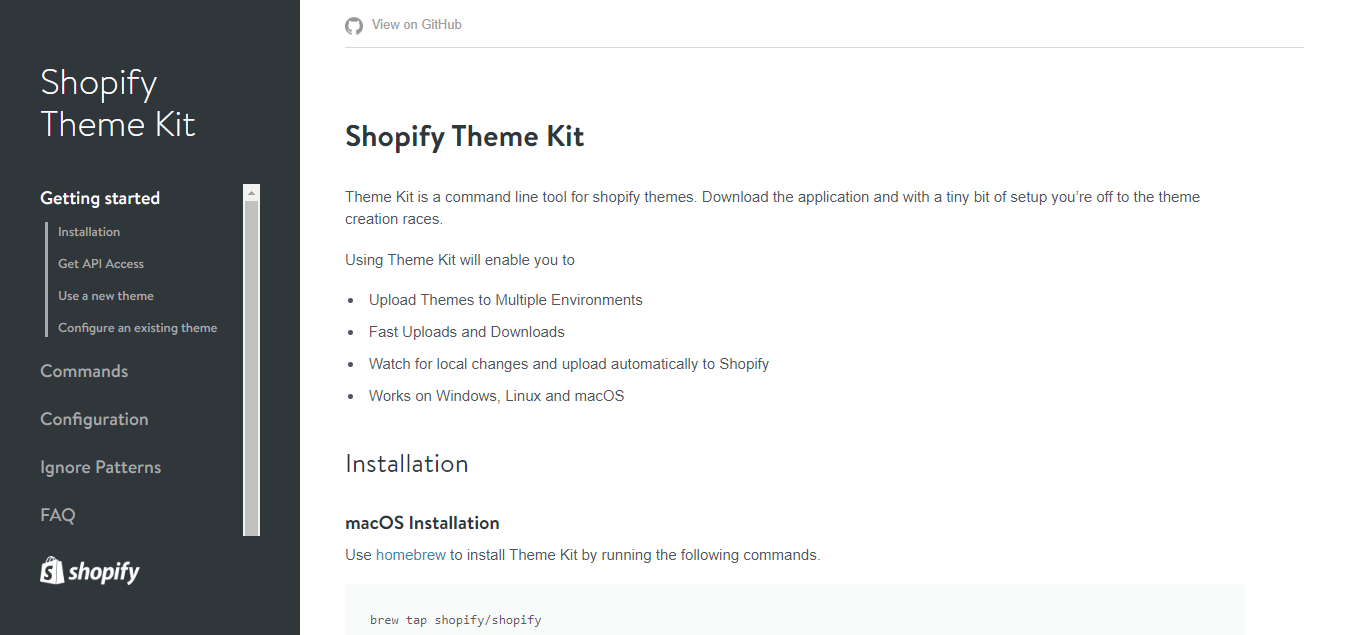
Theme Kit is a command-line tool for Shopify themes, created and maintained by Shopify.
Theme Kit’s features are:
- Upload Themes to Multiple Environments
- Fast Uploads and Downloads
- Watch for local changes and upload automatically to Shopify
- Works on Windows, Linux and macOS
Learn to installation
macOS Installation
Use homebrew to install Theme Kit by running the following commands:
brew tap shopify/shopify
brew install themekit
Linux Installation
If you are on linux based system, you can use the following installation script to automatically download and install the latest Theme Kit for you
curl -s https://shopify.github.io/themekit/scripts/install.py | sudo python
N.B: In macOS, if you don’t want to install through homebrew then you can run the above command. It’ll work for you.
Windows Installation
I recommend you to install Theme Kit through chocolatey. It’ll save your time and it’s very easy to install.
Let’s check you’ve chocolatey installed or not, open Command Prompt as administrator then run this command:
choco -v
Any version after running this command then you’ve chocolatey installed in your machine. If you didn’t get any version then it’s okay, you’ve to install it. You’ll get the installation process in detail here.
If you’re done installing chocolatey, let’s Shopify Theme Kit
choco install themekit
Also, you can install it manually in every operating system.
Let’s check if your installation was successful or not. Run this command to know
theme
If you get something like this then consider the installation as a success:
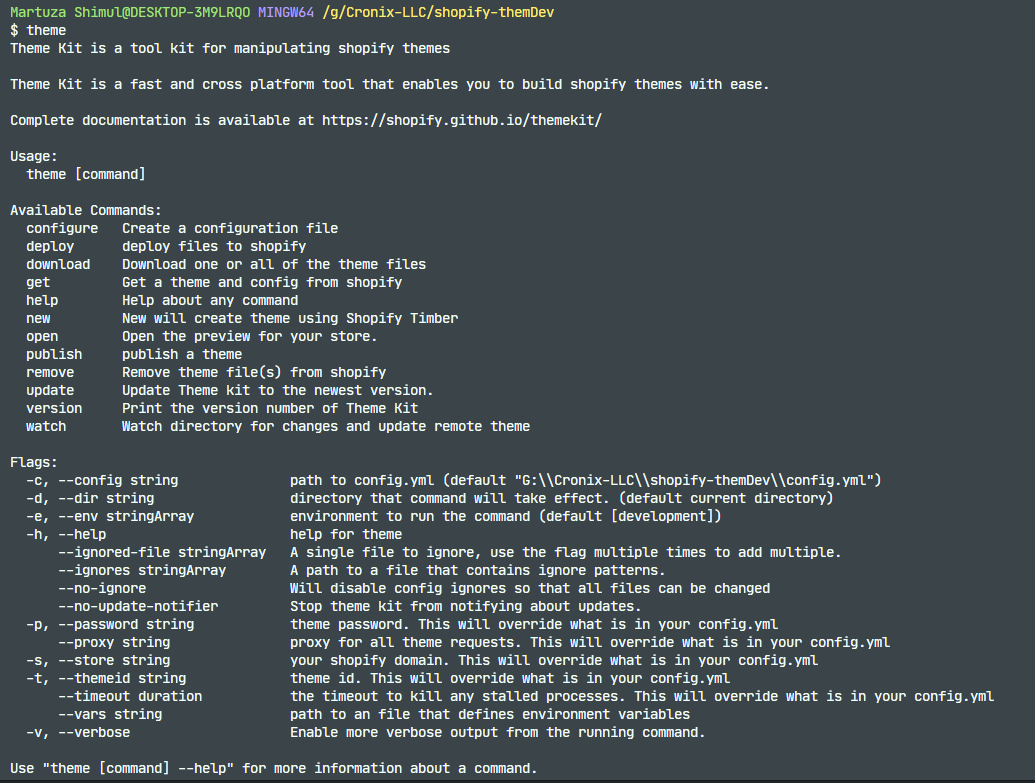
If you don’t get a result like the above then you’ve missed something important in the installation.
Troubleshooting
After following all the steps correctly if you’re facing problems then you should look after these steps.
Uninstall existing instances of the shopify-theme/shopify_theme gem if you have, run the following command:
gem uninstall shopify-theme
Make sure you’re using the most up-to-date themekit. To update the Theme Kit run:
theme update --version=[version number]
For Example
theme update --version=v1.0.3
To test that Theme Kit is working, run:
theme --help
Step 2: Setting up API Credentials
Once Theme Kit is installed, we’ll need a few things to connect our local theme to your existing Shopify Theme Kit We’ll need an API key, password and theme ID.
API key and Password
- Log in to your Shopify Admin
- Go to Apps
- Manage private apps
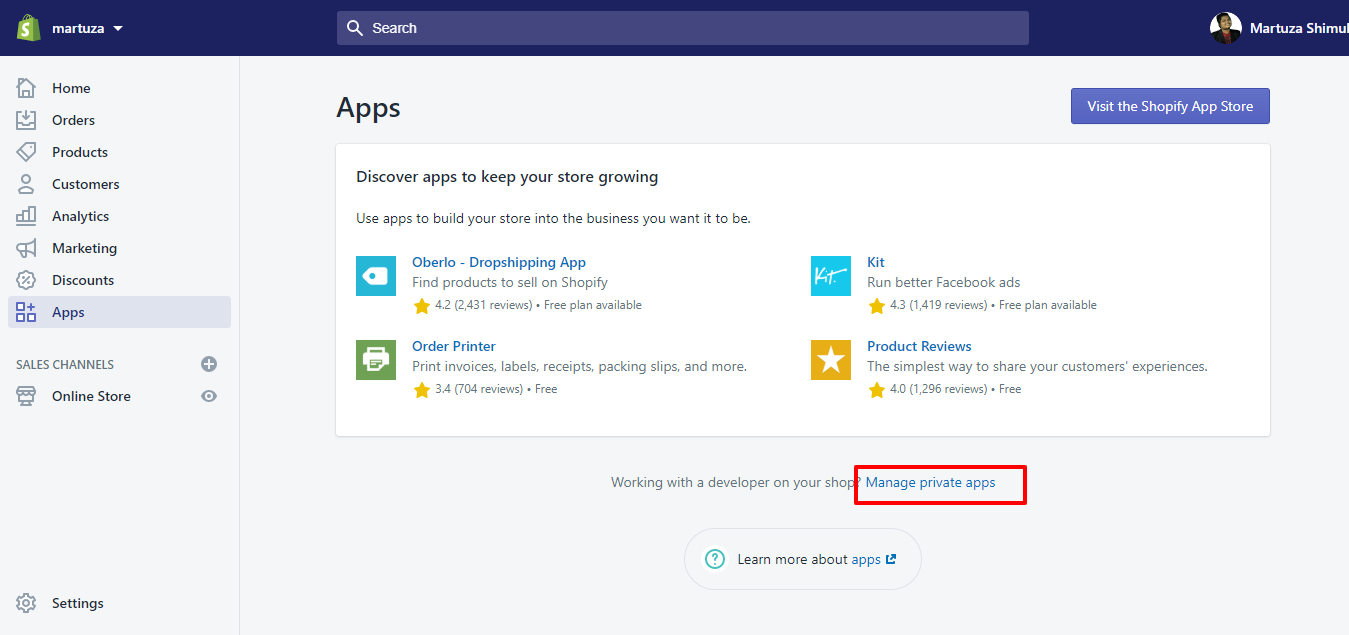
- Create a new private app
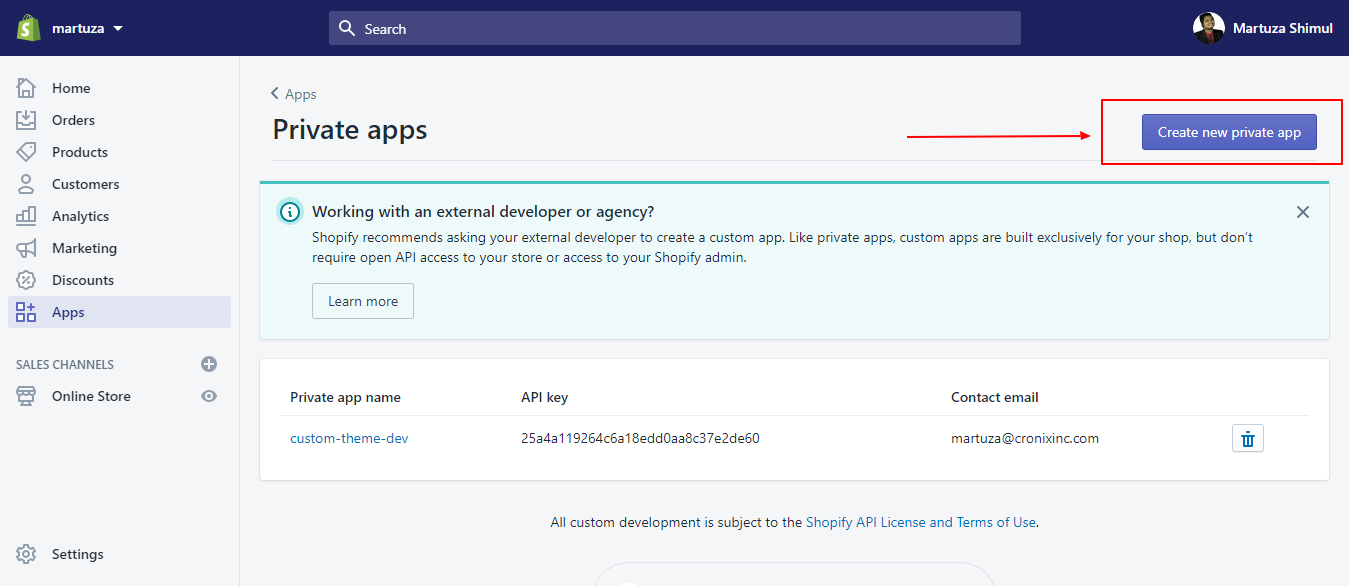
- You’ll need to provide a title(it can be anything) and an emergency email address
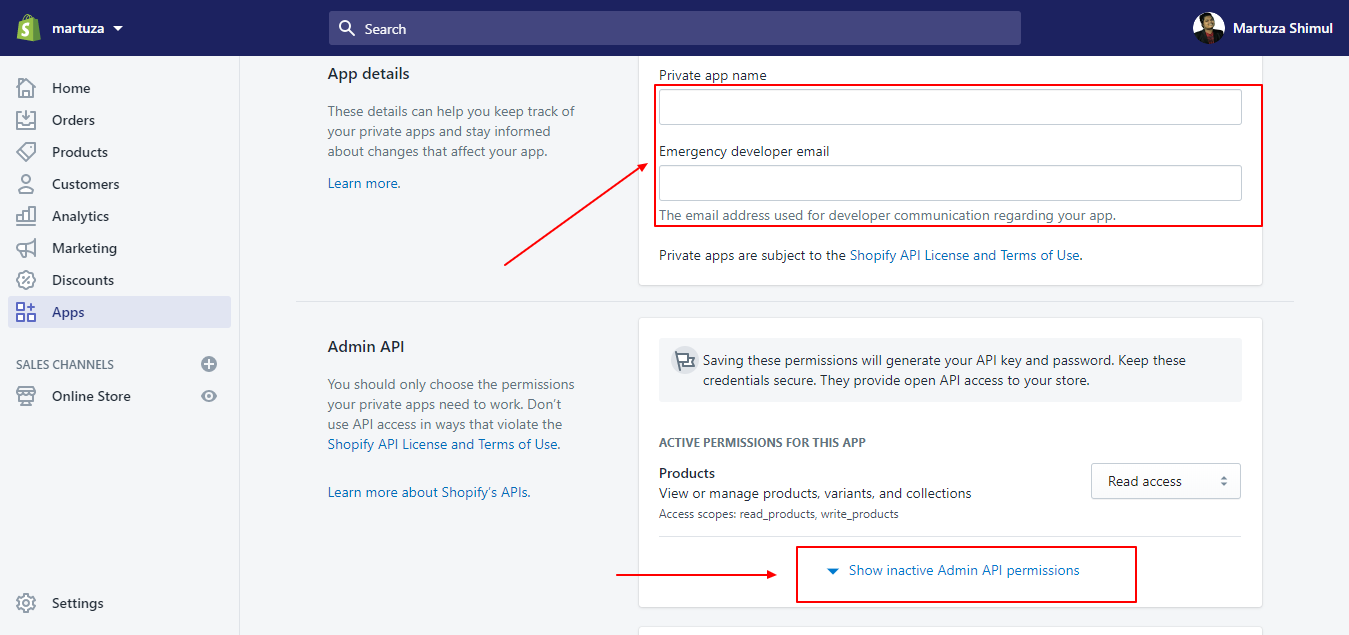
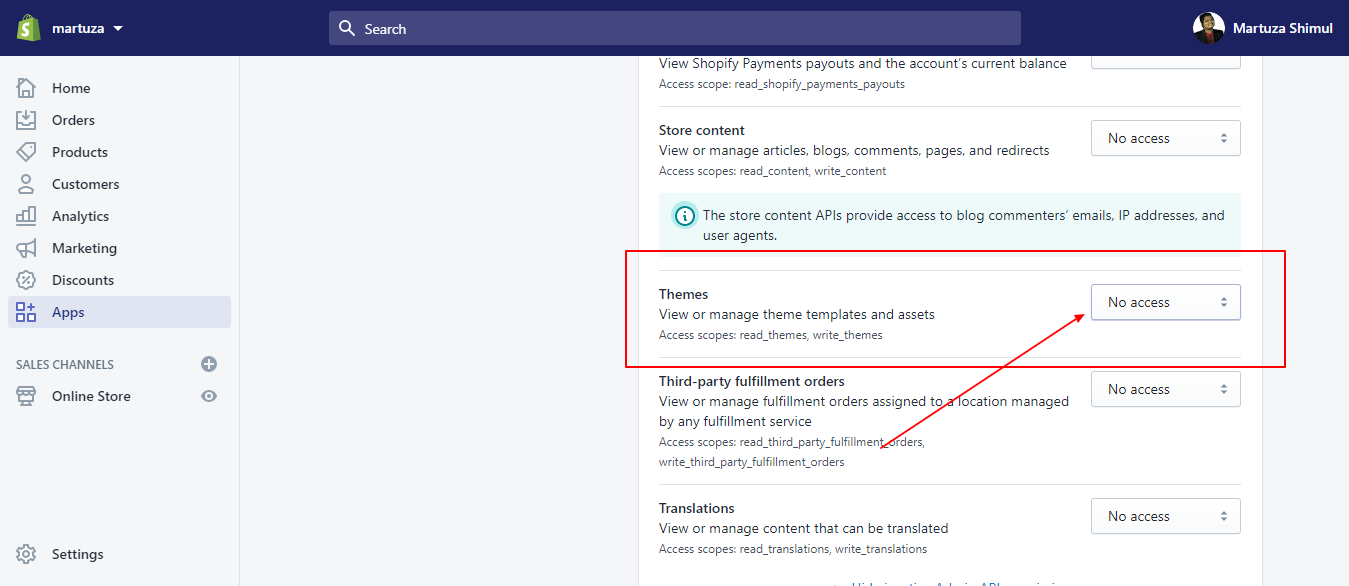
- Set the theme permission ‘read access’ to ‘read and write’ and save
Theme ID
- Go to Shopify Admin > Online Store > Themes > Actions > Edit Code
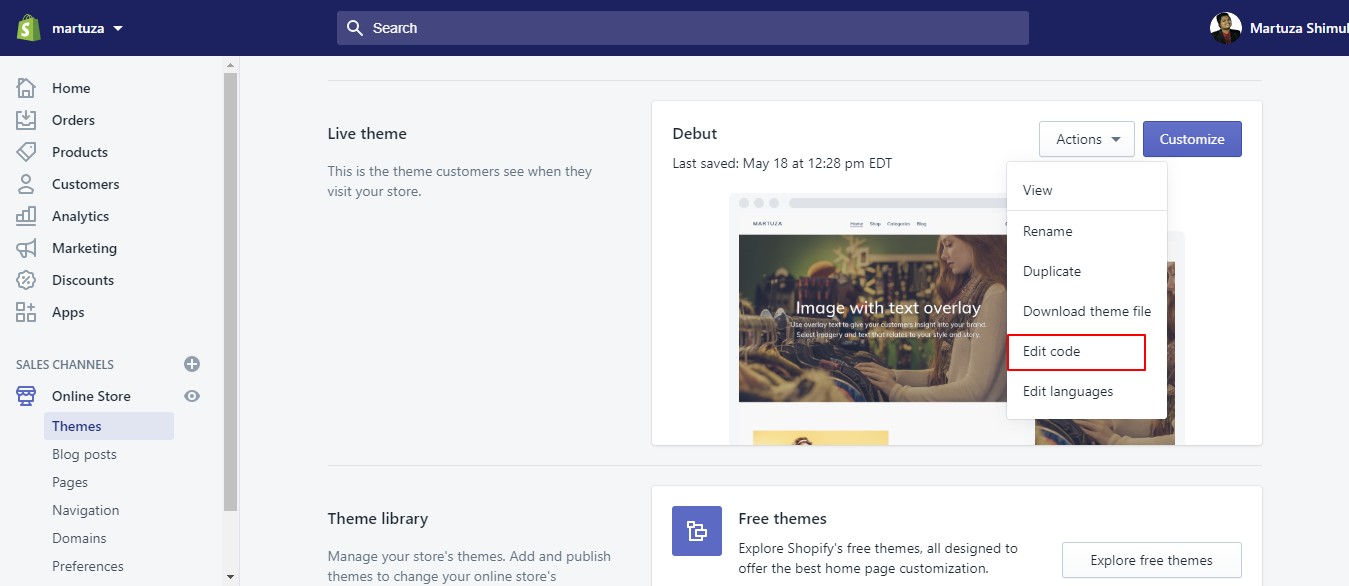
You’ll get a number on the URL, that’s the theme ID.
Here is another way to get the theme ID:
theme get --list --password=[your-api-password] --store=[your-store.myshopify.com]
For Example:
theme get --list --password=shppa_859e51230330e38251047af --store=mart.myshopify.com
This will return you a list of themes and their ThemeID’s that exist on the store specified.
Connect the local Shopify theme development environment
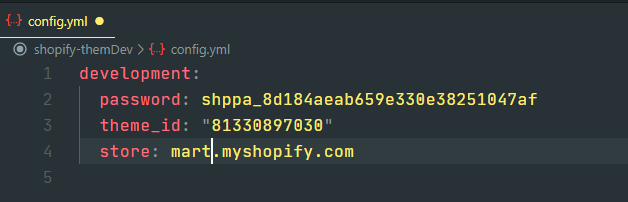
Now we can use all the previous information to create a config.yml file in our Shopify Theme Kit and then download the theme locally. This file is very important because it creates the connection between local dev environment and Shopify store
- Create a directory in your local machine manually or you can run the following command
mkdir [your-directory-name]
- Step into the directory by the following command
cd [your-directory-name]
- Run the following command to get started. It’ll download the specific Shopify Theme Kit and create the config.yml file that connects this theme with a local version in the directory you just created.
theme get --password=[your-api-password] --store=[your-store.myshopify.com] --themeid=[your-theme-id]
For Example:
theme get --password=shppa_8d184aea1230330e38251047af --store=mart.myshopify.com --themeid=81230897030
This will download the theme from Shopify Store to your local dev and create the config.yml file including followings:
Setting up a local Shopify theme development environment from scratch
Run the following command to develop a new theme from scratch
theme new --password=[your-password] --store=[your-store.myshopify.com] --name=[theme name]
This will:
- Generate a basic theme template locally
- Create a theme on Shopify
- Upload the new files to Shopify
- create/update your config file with the configuration for your new theme
Step 3: Push updates to your theme
The connection has been established, now run the following command in your theme directory to push the updates:
theme watch
Learn Shopify theme development will now watch for any changes made to your local files and automatically update the theme to your theme (Shopify store). Type ctrl + c, to close the connection.
Congratulations! You’ve set up Theme Kit successfully. Now build your awesome theme.