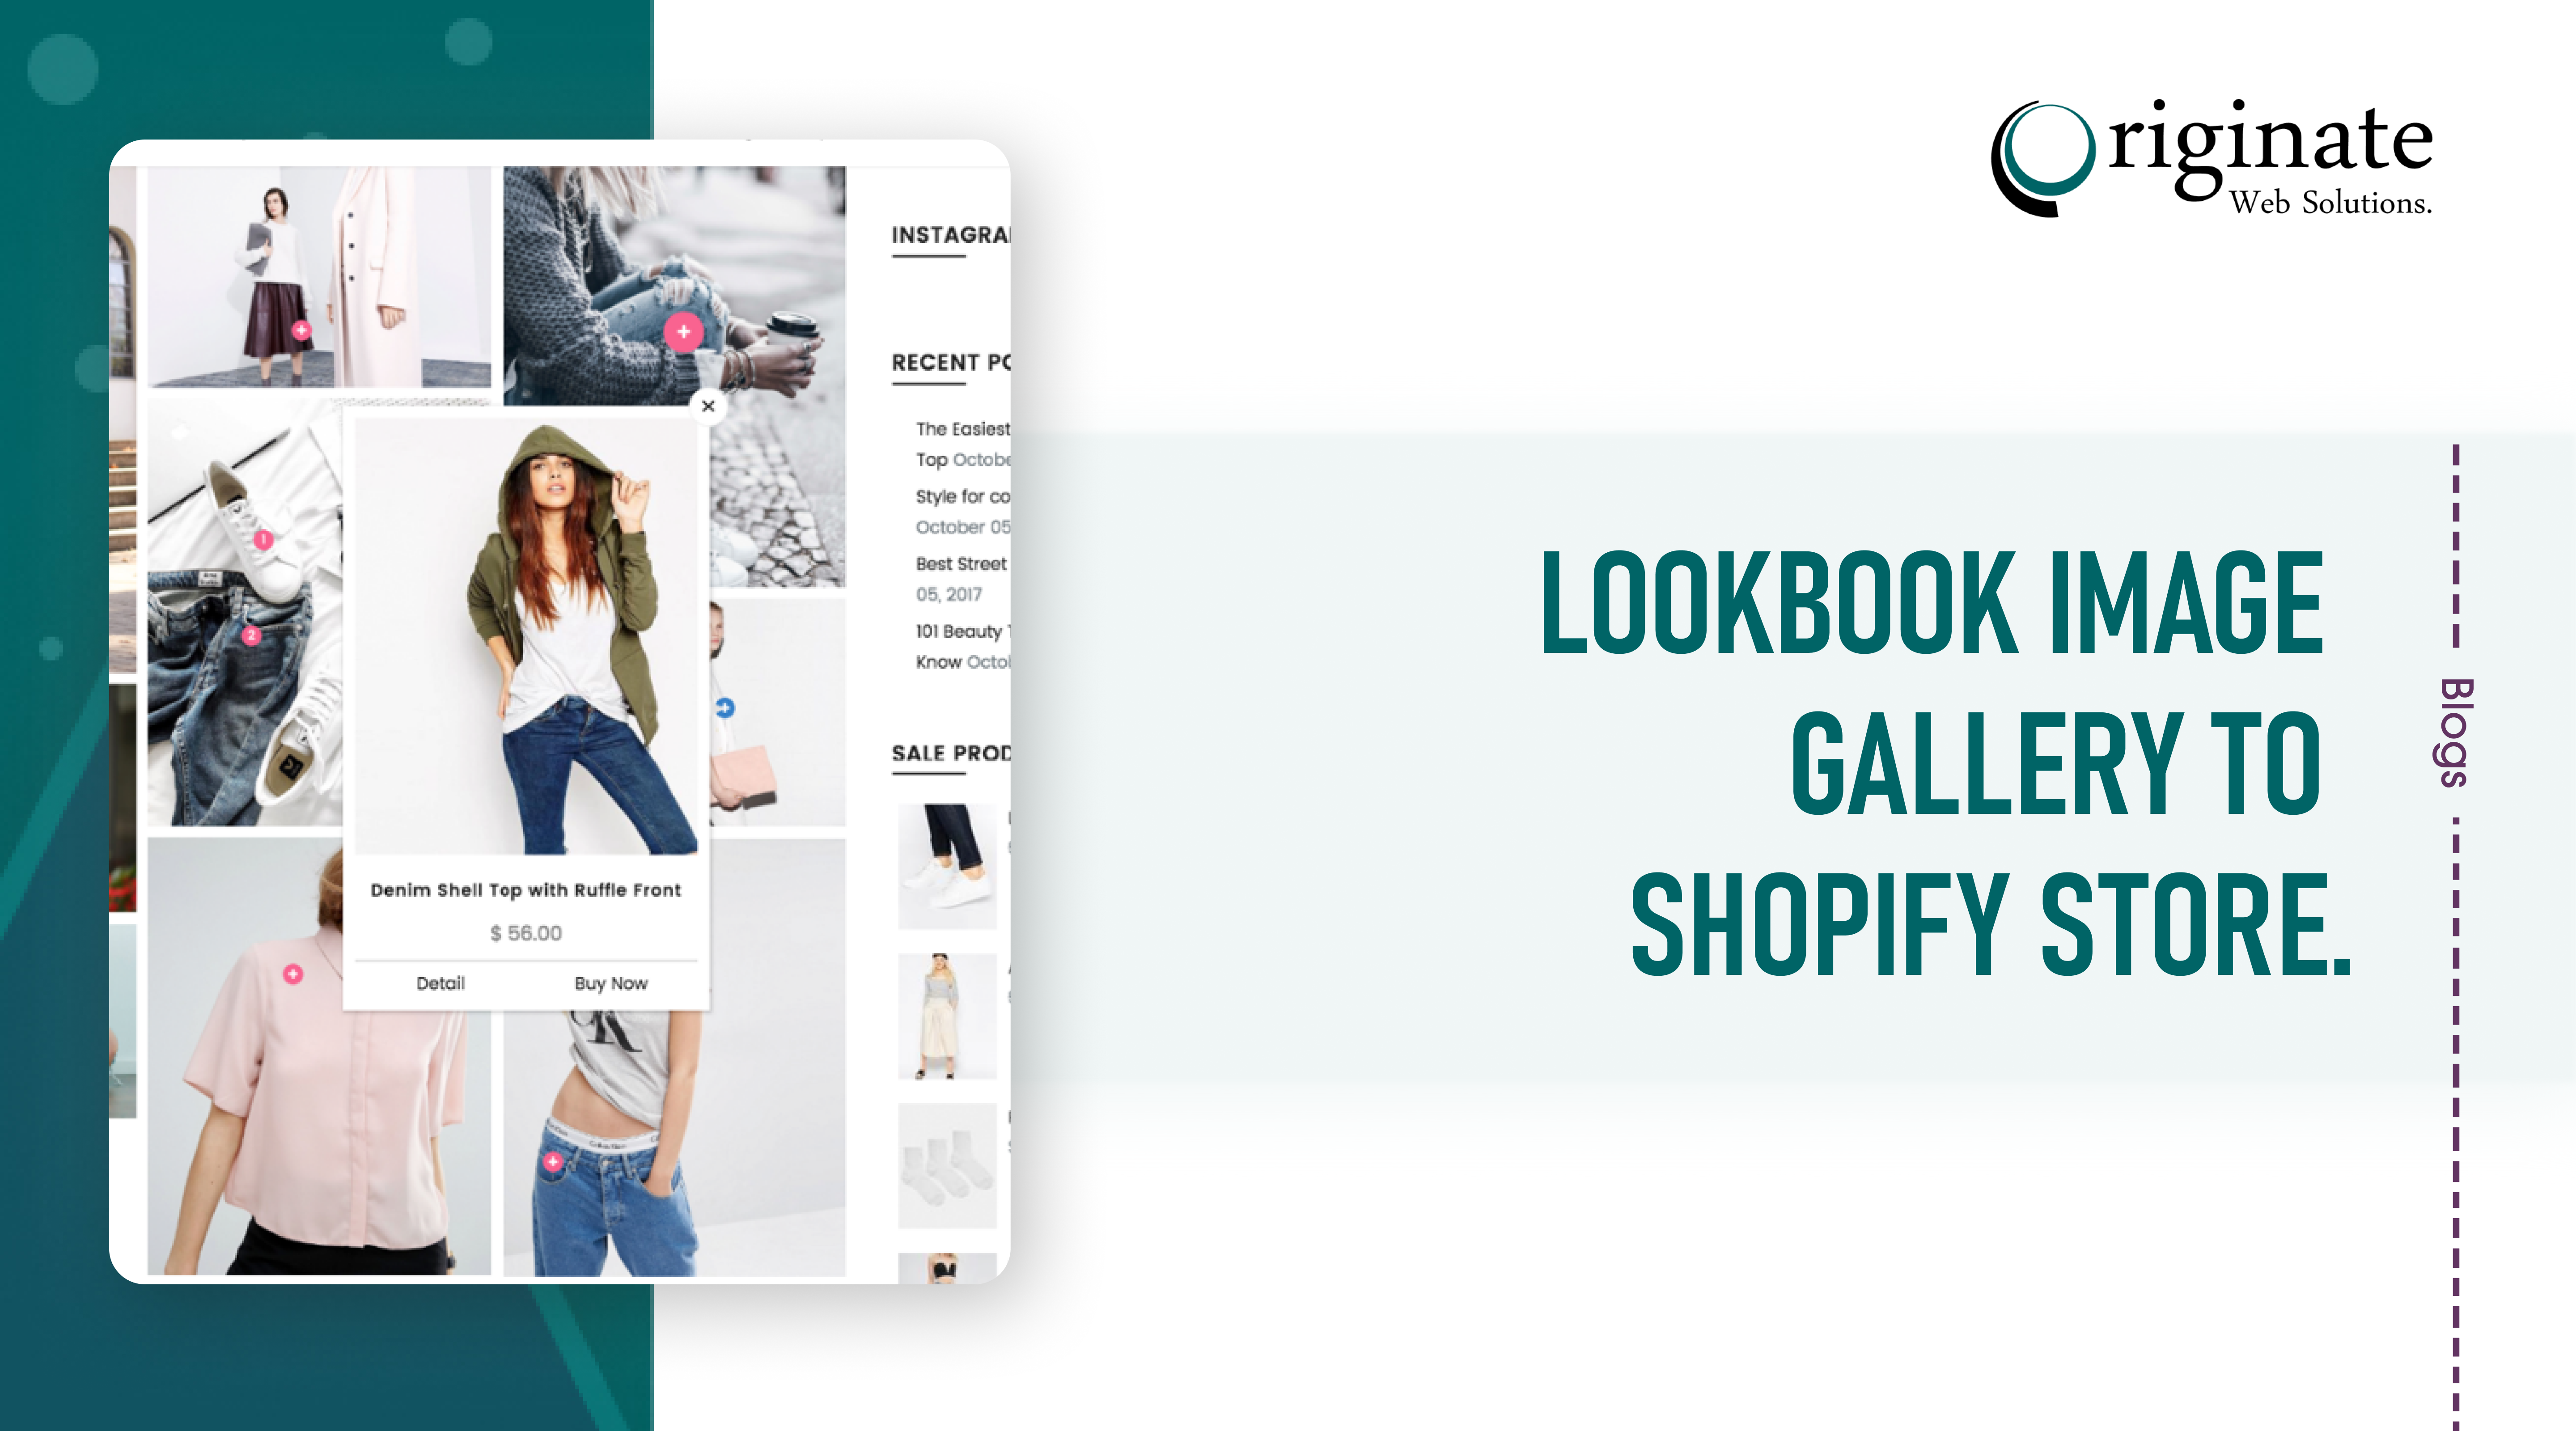
The Lookbook image gallery to Shopify store addon where you could add the images as a gallery and add some text also. Here is the example, click here
Let’s get started
Editing your theme code to add the Lookbook image gallery to Shopify store:
Required files:
- assets [photoswipe.js.liquid, photoswipe.scss.liquid]
- snippets [photoswipe.liquid]
- sections [page-lookbook-template.liquid]
- templates [page.lookbook.liquid]
- In the Assets directory, upload the following files:
- Upload a png image for image place holder and name it ‘default-skin.png’
- photoswipe.js
- photoswipe.js.liquid
- photoswipe.scss.liquid
- In the Snippets directory, create a new file named
photoswipe.liquidand add the following code:
<div class="pswp" tabindex="-1" role="dialog" aria-hidden="true">
  <div class="pswp__bg"></div>
  <div class="pswp__scroll-wrap">
    <div class="pswp__container">
      <div class="pswp__item"></div>
      <div class="pswp__item"></div>
      <div class="pswp__item"></div>
    </div>
    <div class="pswp__ui pswp__ui--hidden">
      <div class="pswp__top-bar">
        <div class="pswp__counter"></div>
        <button class="pswp__button pswp__button--close" title="Close (Esc)"></button>
        <button class="pswp__button pswp__button--share" title="Share"></button>
        <button class="pswp__button pswp__button--fs" title="Toggle fullscreen"></button>
        <button class="pswp__button pswp__button--zoom" title="Zoom in/out"></button>
        <div class="pswp__preloader">
          <div class="pswp__preloader__icn">
            <div class="pswp__preloader__cut">
              <div class="pswp__preloader__donut"></div>
            </div>
          </div>
        </div>
      </div>
      <div class="pswp__share-modal pswp__share-modal--hidden pswp__single-tap">
        <div class="pswp__share-tooltip"></div>
      </div>
      <button class="pswp__button pswp__button--arrow--left" title="Previous (arrow left)">
      </button>
      <button class="pswp__button pswp__button--arrow--right" title="Next (arrow right)">
      </button>
      <div class="pswp__caption">
        <div class="pswp__caption__center"></div>
      </div>
    </div>
  </div>
</div>
- In the Section directory, create a new file named
page-lookbook-template.liquidand add the following code:
<div class="grid grid-lookbook {% if section.settings.enable_modal %} modal-lookbook{% endif %} {% if section.settings.remove_spacing %} no-spacing{% endif %}">
  {% for block in section.blocks %}
  {% if block.type == 'image' %}
  {%- assign img_url = block.settings.img | img_url: '1x1' | replace: '_1x1.', '_{width}x.' -%}
    <div class="grid__item {% if section.settings.layout == "4" %} medium-up--one-quarter{% else %}  medium-up--one-third{% endif %} small--one-half one-whole">
      <figure class="lookbook-img lookbook-img-{{ forloop.index }}">
        <a href="{% if section.settings.enable_modal %}{{ block.settings.img | img_url: 'master' }}{% else %}{{block.settings.link}}{% endif %}"{% if section.settings.enable_modal %} data-size="{{ block.settings.img.width }}x{{ block.settings.img.height }}"{% endif %}><img data-sizes="auto" data-src="{{img_url}}" data-widths="[320, 460, 540, 720, 900, 1080, 1296, 1512, 1728, 2048]" src="{{ block.settings.img | img_url: '440x440' }}" class="lazyload lazypreload img"></a>
        <figcaption class="lookbook-cap">
          <h3 class="title"><a href="{{block.settings.link}}">{{block.settings.title}}</a></h3>
          <div class="text">{{block.settings.content}}</div>
        </figcaption>
      </figure>

    </div>
  {% endif %}
{% endfor %}
</div>
<style>
  @media (max-width:480px){
  .grid-lookbook .one-whole{width:100%;}
  }
  .grid.no-spacing{margin:0;}
  .grid-lookbook.no-spacing .grid__item{padding:0;}
  .grid.no-spacing .lookbook-img{margin:0;}
  .lookbook-img{position:relative;margin:0 0 30px;padding:0;}
  .lookbook-img img{width:100%;}
  .lookbook-cap{position:absolute;left:0;right:0;bottom:0;padding:10px;}
  .lookbook-cap .title{font-size:inherit;margin:0;padding:0;}
  .lookbook-cap .text{font-size:90%;opacity:0.8;}
  .lookbook-cap p{margin:0;padding:5px 0 0;color:inherit;}
  .lookbook-cap a, .lookbook-cap a:hover, .lookbook-cap a:focus{color:inherit;}
  {%- for block in section.blocks -%}
      {%- if block.type == 'image' -%}
  .lookbook-img-{{ forloop.index }} .lookbook-cap{
    color: {{ block.settings.color }};
    opacity: {{ bgcolor_opacity | divide_by: 10.0 }};
    background: {{ block.settings.bgcolor }};
  }

    {%- endif -%}
  {%- endfor -%}
  .pswp .title{margin:0;color:#fff;}
  .pswp .title a{text-decoration:underline;}
  .pswp .pswp__caption p, .pswp a, .pswp a:hover, .pswp a:focus{color:inherit;}
  .pswp .pswp__ui--fit .pswp__caption{color:#fff;background:rgba(0,0,0,0.75);}
</style>

{% if section.settings.enable_modal %}
{{ 'photoswipe.scss.css' | asset_url | stylesheet_tag }}
<script src="{{ 'photoswipe.js' | asset_url }}" defer="defer"></script>
{% endif %}

{% schema %}
  {
    "name": "Lookbook",
    "settings": [
      {
        "type": "header",
        "content": "Lookbook"
      },
      {
        "type": "select",
        "id": "layout",
        "label" : "Columns",
        "options": [
          {
          "value": "3",
          "label": "3"
          },
          {
          "value": "4",
          "label": "4"
          }
        ],
        "default" : "3"
      },
      {
        "type": "checkbox",
        "id": "remove_spacing",
        "label": "Remove spacing between grid",
        "default": true
      },
      {
        "type": "checkbox",
        "id": "enable_modal",
        "label": "Enable Modal",
        "default": true
      }
    ],
    "blocks": [
      {
        "type": "image",
        "name": "Image",
        "settings": [
          {
            "type": "url",
            "id": "link",
            "label": "Link"
          },
          {
            "type": "image_picker",
            "id": "img",
            "label": "Image"
          },
          {
            "type": "text",
            "id": "title",
            "label": "Title"
          },
          {
            "type": "richtext",
            "id": "content",
            "label": "Text"
          },
          {
            "type": "color",
            "id": "color",
            "label": "Text color",
            "default": "#ffffff"
          },
          {
            "type": "color",
            "id": "bgcolor",
            "label": "Background",
            "default": "#0c0c0d"
          },
          {
            "type": "range",
            "id": "bgcolor_opacity",
            "label": "Background Overlay",
            "min": 0,
            "max": 100,
            "step": 10,
            "default": 50
          }
        ]
      }
    ]
  }
{% endschema %}

{% stylesheet %}
{% endstylesheet %}

{% javascript %}
{% endjavascript %}
- In the Templates directory, create a new file named
page.lookbook.liquidand add the following code:
<div class="page-width">
  <div class="section-header text-center">
    <h1>{{ page.title }}</h1>
  </div>
  <div class="rte">
    {{ page.content }}
  </div>
  {% section 'page-lookbook-template' %}
</div>
- Layout director, open
theme.liquidand locate the end tag of</body>, place the following code right above the tag:
{%- if template contains 'page.lookbook' -%}
    {% include 'photoswipe' %}
  {%- endif -%}
- Congrats, You’ve completed the coding parts. Now go to Sales channels>pages, create a new page and set the page template to
page.lookbook - Now it’s available in Themes>customization page section settings. Upload/select your images
- You can add styling for design to assets> photoswipe.scss.liquid