You can feature a subset of collections on a custom page by editing your theme code. This tutorial shows you how to create a new page template and assign collections to show by using a menu.
All Shopify stores have a collections list page at the URL www.mystore.com/collections that shows all of the collections in the store. As an alternative to this tutorial, you can edit your collections list page to show only a selection of your collections.
Editing your theme code to add the featured collection page
Required files: template [page.collections.liquid] ; section [page-collections-template.liquid]
- In the Section directory, create a new file named
page-collections-template.liquidand add the following code:
{%- assign curr_page_url = page.url -%}
{%- assign column = section.settings.column -%}
{%- assign img_max_height = 300 -%}
{%- assign column_class = " " -%}
{%- if column == 3 -%}
    {%- assign img_max_height = 450 -%}
    {%- assign column_class = " medium-up--one-third " -%}
{%- elsif column == 4 -%}
    {%- assign img_max_height = 350 -%}
    {%- assign column_class = " medium-up--one-quarter" -%}
{%- elsif column == 2 -%}
    {%- assign img_max_height = 600 -%}
    {%- assign column_class = " medium-up--one-half " -%}
{%- endif -%}
{% for link in linklists[section.settings.featured_collections].links %}
  {%- assign outerLoopIndex = forloop.index -%}
  {% if link.type == "page_link" and curr_page_url == link.url %}
    {% for sub_link in link.links %}
      {% if sub_link.type == "collection_link" %}
        <h2>{{sub_link.title}}</h2>
        {%- assign sub_link_arr = sub_link.url | split: '/' -%}
        {%- assign col_tag_url = sub_link_arr[3] | split: '+' -%}
          {%- capture col_tags -%}
            {%- for col_tag in col_tag_url -%}{{ col_tag | handleize }}{%- if forloop.last == false -%},{%- endif -%}{%- endfor -%}
          {%- endcapture -%}
        {%- assign col_tags = col_tags | split: ',' -%}
        <ul class="grid grid--uniform">
          {%- assign sub_link_handle = sub_link_arr[2] -%}
          {%- assign prod_limit = section.settings.limit -%}
          {% assign prod_count = 1 %}
          {%- for product in collections[sub_link_handle].products -%}
            {%- if col_tag_url.size > 0 -%}
              {%- capture prod_tags -%}
                {%- for prod_tag in product.tags -%}{{ prod_tag | handleize }}{%- if forloop.last == false -%},{%- endif -%}{%- endfor -%}
              {%- endcapture -%}
                {%- assign prod_tags = prod_tags | split: ',' -%}
                {%- assign prod_tags_find = false -%}
                {% assign count = 0 %}
                {%- for c_tag in col_tags -%}
                  {%- if prod_tags contains c_tag -%}
                    {% assign count = count | plus: 1 %}
                  {%- endif -%}
                {%- endfor -%}
                {%- if count == col_tags.size -%}
                    <li class="grid__item {{column_class}} small--one-half">{% include 'product-card-grid', max_height: img_max_height %}</li>
                    {% assign prod_count = prod_count | plus: 1 %}
                {%- endif -%}
            {%- else -%}
                <li class="grid__item {{column_class}} small--one-half">{% include 'product-card-grid', max_height: img_max_height %}</li>
                {% assign prod_count = prod_count | plus: 1 %}
            {%- endif -%}
            {% if prod_count > prod_limit %}
                {% break %}
            {% endif %}
          {%- endfor -%}
        </ul>
      {% endif %}
    {% endfor %}
  {% endif %}
{% endfor %}

{% schema %}
  {
    "name": "Featured Collections",
    "settings": [
      {
        "type": "header",
        "content": "Featured Collection Nav"
      },
      {
        "type": "link_list",
        "id": "featured_collections",
        "label": "Select Nav",
        "default": "main-menu"
      },
      {
        "type": "number",
        "id": "limit",
        "label": "Product Limit",
        "default": 4
      },
      {
        "type": "range",
        "id": "column",
        "label": "Column",
        "min": 2,
        "max": 4,
        "step": 1,
        "default": 4
      }
    ]
  }
{% endschema %}

{% stylesheet %}
{% endstylesheet %}

{% javascript %}
{% endjavascript %}
- Templates directory, create a new file named
page.collections.liquidand add the following code :
{%- assign page_content = page.content |  split: '<!-- split -->' -%}
<div class="page-width page-collections">
  <div class="section-header text-center">
    <h1>{{ page.title }}</h1>
  </div>
  <div class="rte">
    {%- if page_content.size > 1 -%}
    {{page_content[0]}}
    {%- else -%}
    {{ page.content }}
    {%- endif -%}
  </div>
  {% section 'page-collections-template' %}
    {%- if page_content.size > 1 -%}
    {{page_content[1]}}
    {%- endif -%}
</div>
- Congrats, You’ve completed the coding parts.
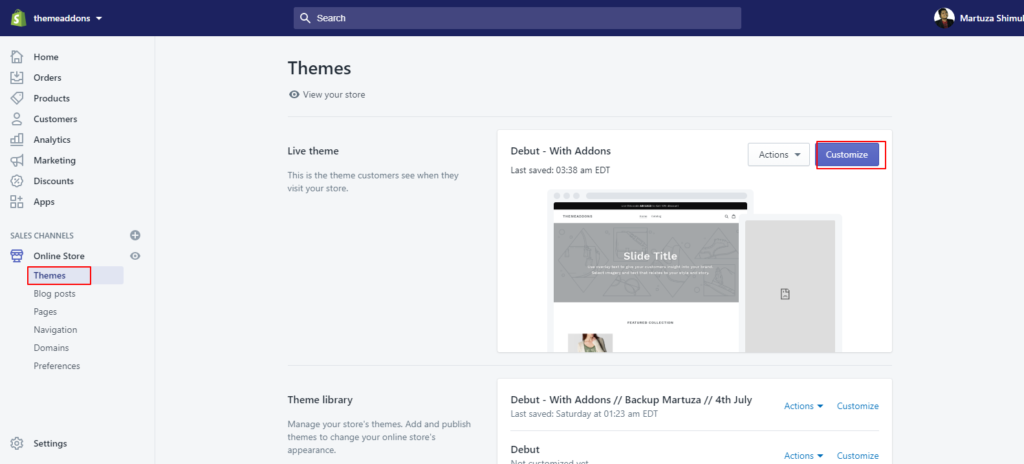
- Go to
Sales Channels>pages>Add pageand set the page template topage.collections. Now it’s manageable from the backend(theme section)

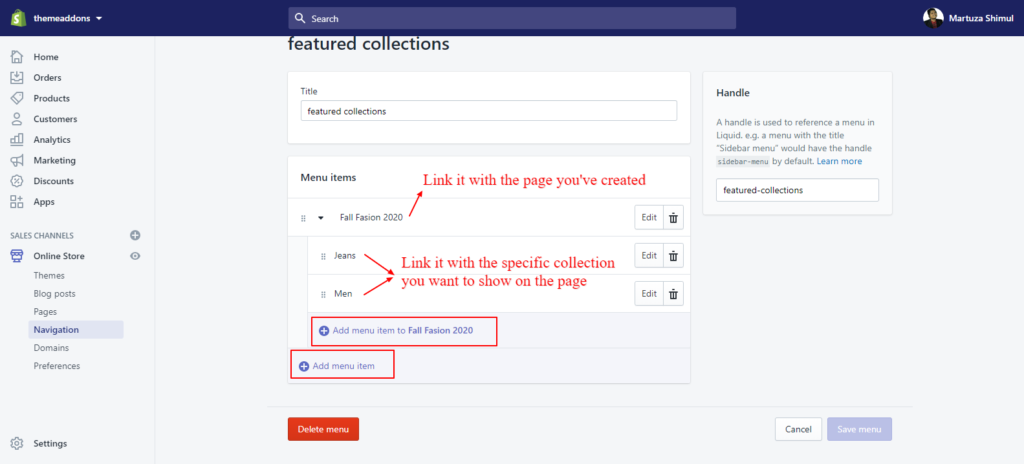
We need to create a nav to show the specific collection on the page
- Go to Sales
Channels> Navigation> Add menu, name the menu whatever you want. Add menu item and link it with the page you’ve created, add submenu and link these submenus with the specific collection you want to show on the page

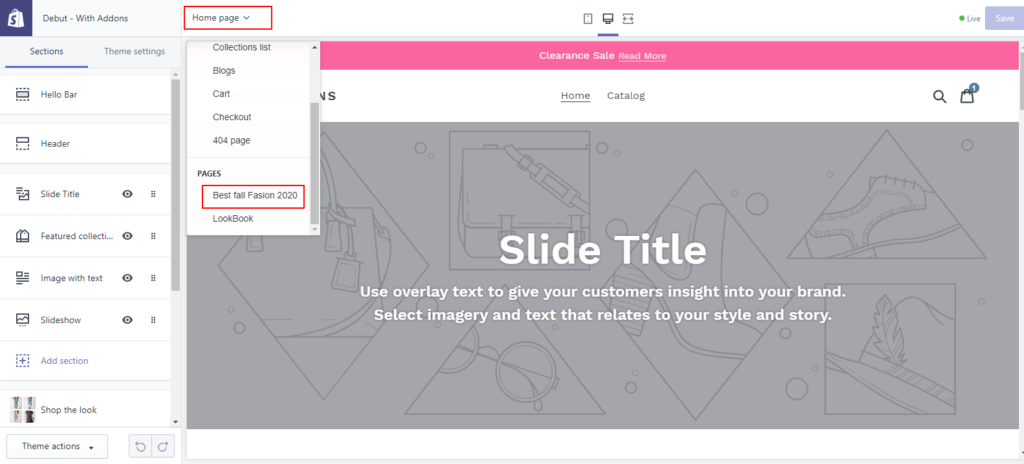
- Now it’s available in
Themes>customization>pages>your page namepage section settings. Click Featured collections, you could get an option to select Navigation, select the specific Nav which you’ve created for the page.collections template