Shopify needs no introduction for its immense benefits for managing and selling online goods and services. To cope with its increasing popularity, a large amount of server data is retrieved by the users and developers. This is where the Android GraphQL mutation comes into play.
Thanks to the Shopify integration with GraphQL mutation, the developers can easily retrieve the required data to develop and deliver exceptional engaging solutions for online stores. Moreover, GraphQL enhances the interaction with APIs along with showering immense opportunities for app developers.
To help you make the best use of Shopify Graph QL API, we have compiled the essential information. We are here to assist you to take possible advantage of Graph QL admin API to ensure success and higher visibility for your online business.
What Is GraphQL?
Before digging in deep with the use of Graph QL, it is important to understand its basic concepts. This will help in its better use to get the desired results.
GraphQL or Graph Query Language came into the limelight in the year 2015 as a popular open-source query language used for APIs. It reduces the runtime to get the relevant information out from the existing data.
To understand this in simple words, GraphQL is an expressive and structured way to request the required data from multiple applications. Another important benefit of relying on the Android GraphQL mutation is that the clients can request different resources using a single API call unlike the REST APIs. In response to the request call, the clients will only receive the exact information.
With the help of the GraphQL query formatter, the clients or users are provided with only the requested information. This eliminates the need to handle unwanted information and thus, minimizes the hassles of the clients.
The Different APIs Needed –
You can use the 2 popular APIs when working with the GraphQL query formatter, which are:
Admin API:
This can be used to develop new applications and integrate the same with Shopify admin. It is also useful in managing the back office Shopify work such as managing the orders, handling the shipping formalities, getting feedback, focusing on optimization, etc.
Storefront API:
This API type is used to develop customized shopping and purchase experiences for customers. It can be used for extracting the user experience data to get the relevant solution to enhance customer buying decisions.
It can also be trusted to display the fetched data from single or multiple products for increasing the visibility and brand value of the required products.
Now, let us get into the details to understand the Shopify GraphQL API.
Android GraphQL Mutation Prerequisites –
You need:
- Understanding of APIs
- A private online app created on your store with permission to read and write through products, customers, orders, etc.
- The Insomnia API client makes various calls to the admin API in Shopify GraphQL
Configuring the Insomnia API –
After installing Insomnia, it is important to successfully configure it to import the collection and make the required store calls using the API credentials. You can use the following steps for Insomnia API configuration:
Importing the collection:
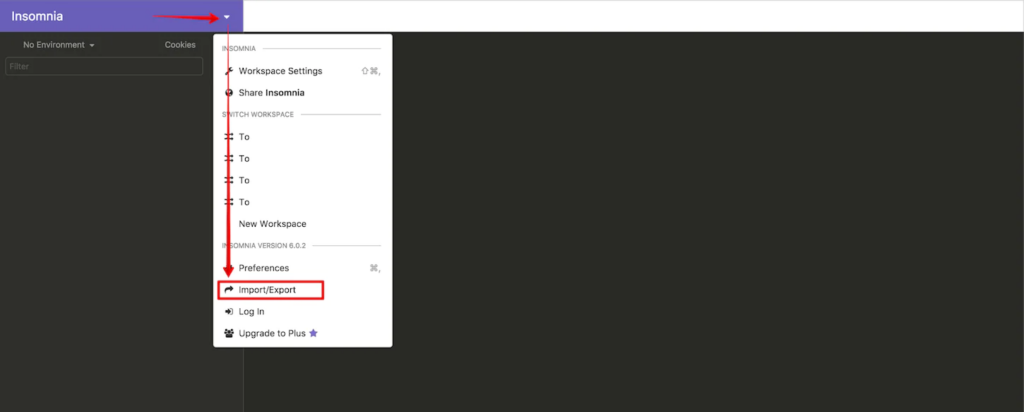
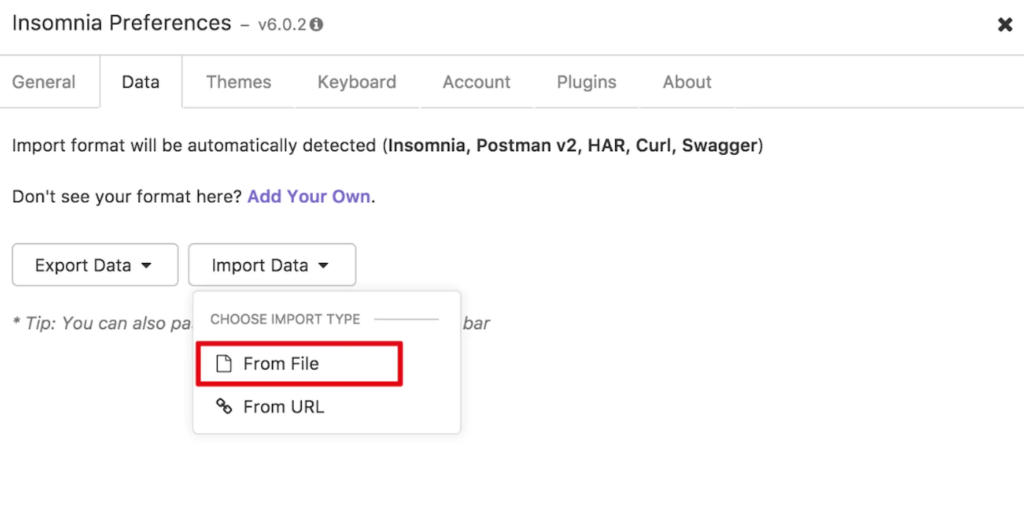
As soon as you download the walkthrough collection, import it into Insomnia.
In insomnia, open the import/export window
- Browse through the collection using the data tab
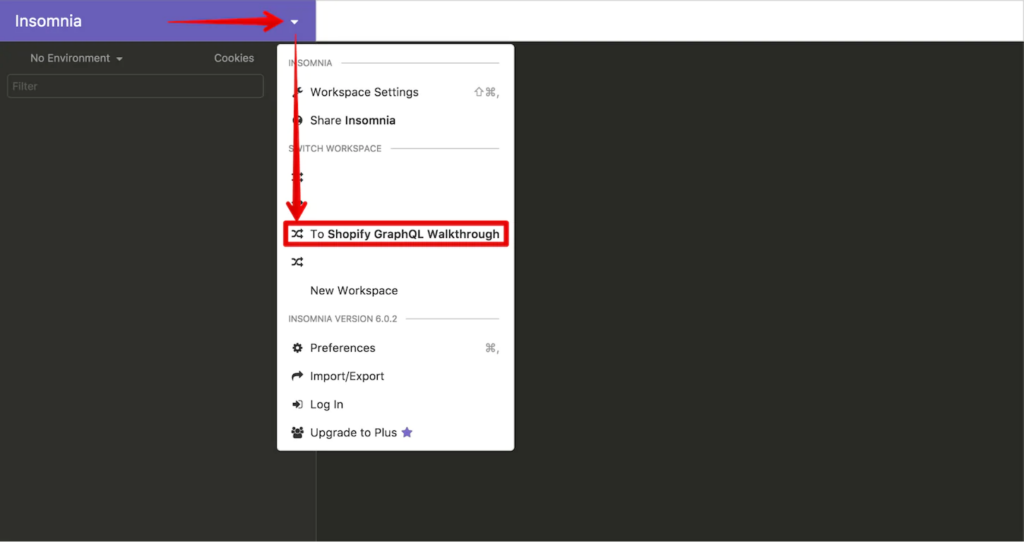
- Now, switch through the Shopify GraphQL workspace
Configuring the environment variables:
With the environment variables, you can easily refer to the values without writing them every time. These variables are the JSON key-value pairs that ease the Android GraphQL mutation.
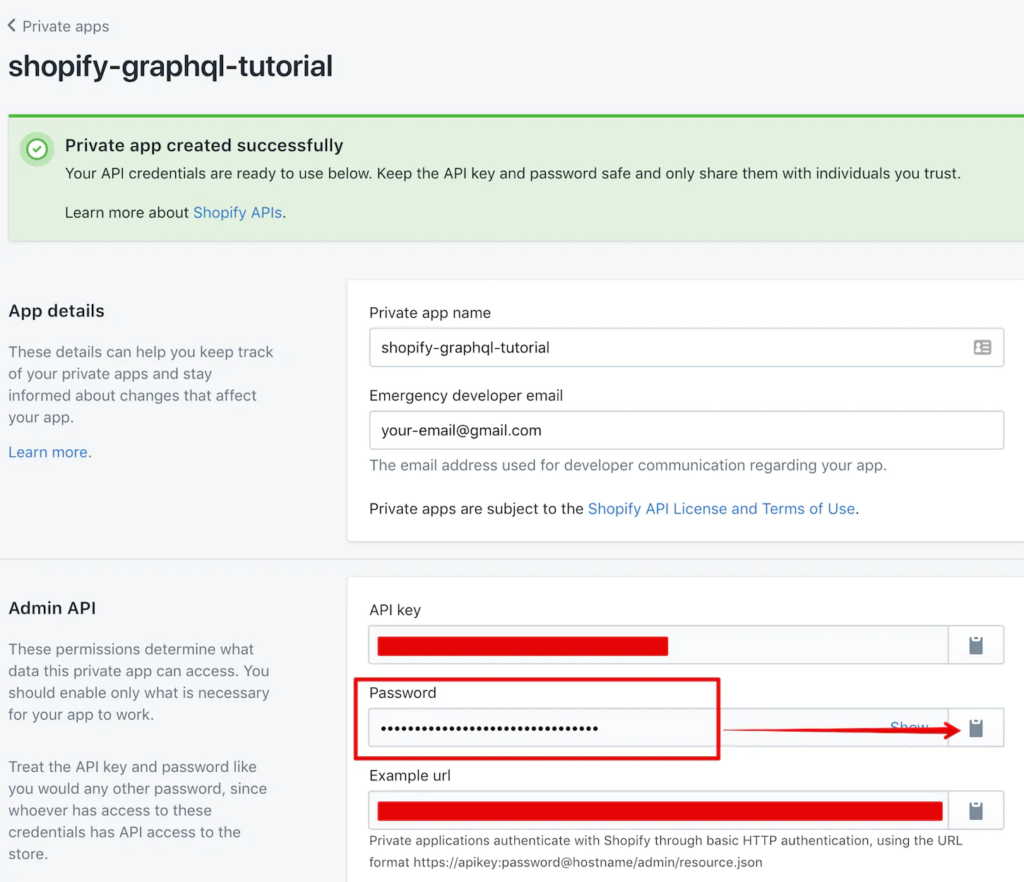
You need 2 environment variables for the interaction –
- Store – such as storename.myshopify.com, simply enter your store name in the required place
- Access Token – use the password of your private app which is easily visible on the app’s page
You can easily change the insomnia environment variables for reusing all the queries with multiple Shopify stores without any complications.
Running the test query:
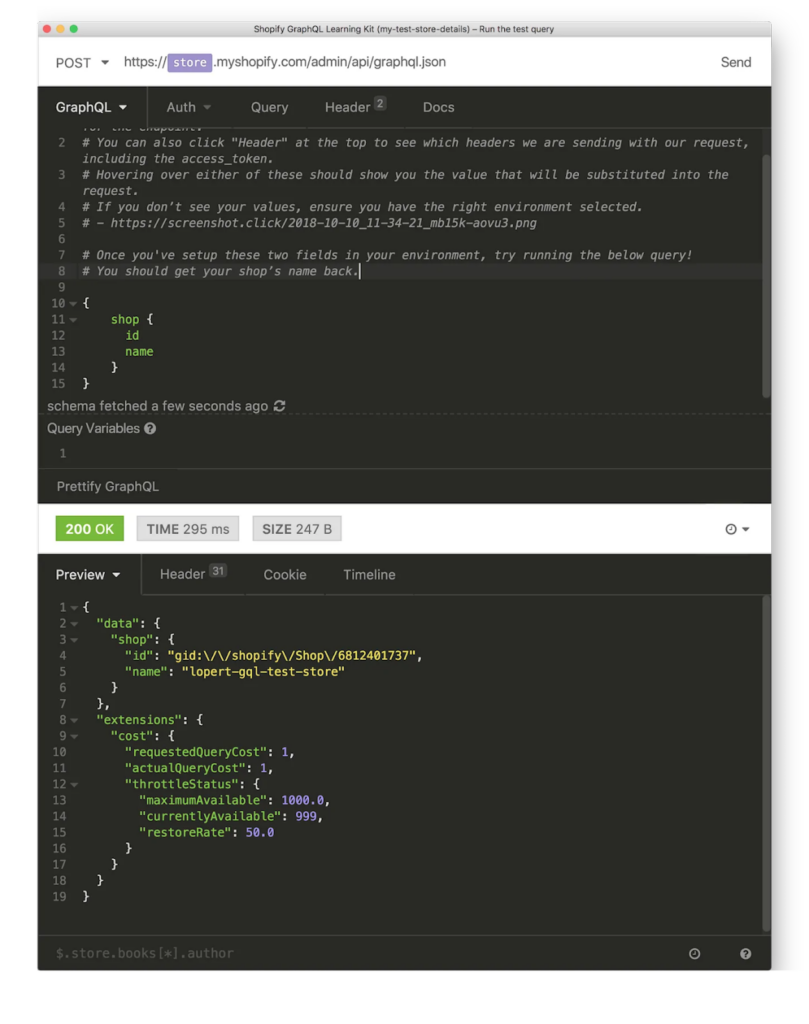
Under GraphQL Shopify walkthrough → Insomnia Configuration → Run the test query
Examine the top of the frame to use the required store name for building address of the endpoint.
Confirm the headers to which you are sending the requests, including the access_token by clicking on the header section.
Now, set the required value in the environment variables and run the following query to get your store’s name back.
Can You Submit Multiple Queries In A Single GraphQL Request?
Yes, it is possible to submit multiple mutations using a single GraphQL request. You can do this by using the following key points –
- Mention the type on the top for clarity, query, or mutation
- Name every individual query like <your-custom-name>: <query/mutation-name-that-you-are-invoking>
- Avoid using the same queries
- Select the fields you want back in every individual query
Final Thoughts:
The Android GraphQL mutation offers higher efficiency and results; as a result, more and more developers are now relying on GraphQL for developing user cases. The Shopify GraphQL API adds ease and convenience for the developers to fetch the required data by minimizing the interaction with the server.
Without any doubt, the Shopify GraphQL admin API is extremely fast and flexible. The GraphQL query formatter simply improves the app’s capabilities and functionalities by accessing the required data from multiple objects using a single call.
To get further information about the efficiency of Android GraphQL mutation, you can connect with us in the comment section. We are always available to offer the required assistance to make the best use of GraphQL integrations.

