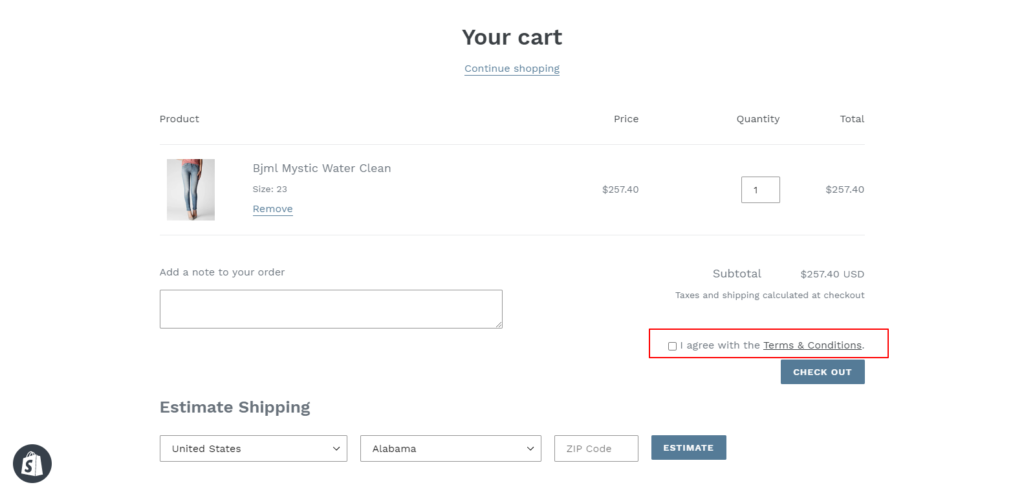
You can add an I agree with the terms and conditions checkbox to your cart page that customers must check before continuing to the checkout. If a customer doesn’t check the Terms and Conditions checkbox before clicking the add an agree to terms and conditions checkout button, an alert pop up will prevent them from continuing.
Add an “Terms and conditions checkbox” to your cart page that customers must always be check before continuing to the checkout. Add terms and conditions to your cart that customers must check before the checkout. Popup will show if there have no available checkbox.
The app will add the date and time of when the customer has ticked the checkbox and agreed to your terms and conditions to the order details under the Additional Details section. This app can be used to add a customizable ‘agree to terms and conditions checkbox’ very easily, to your cart page or drawer.
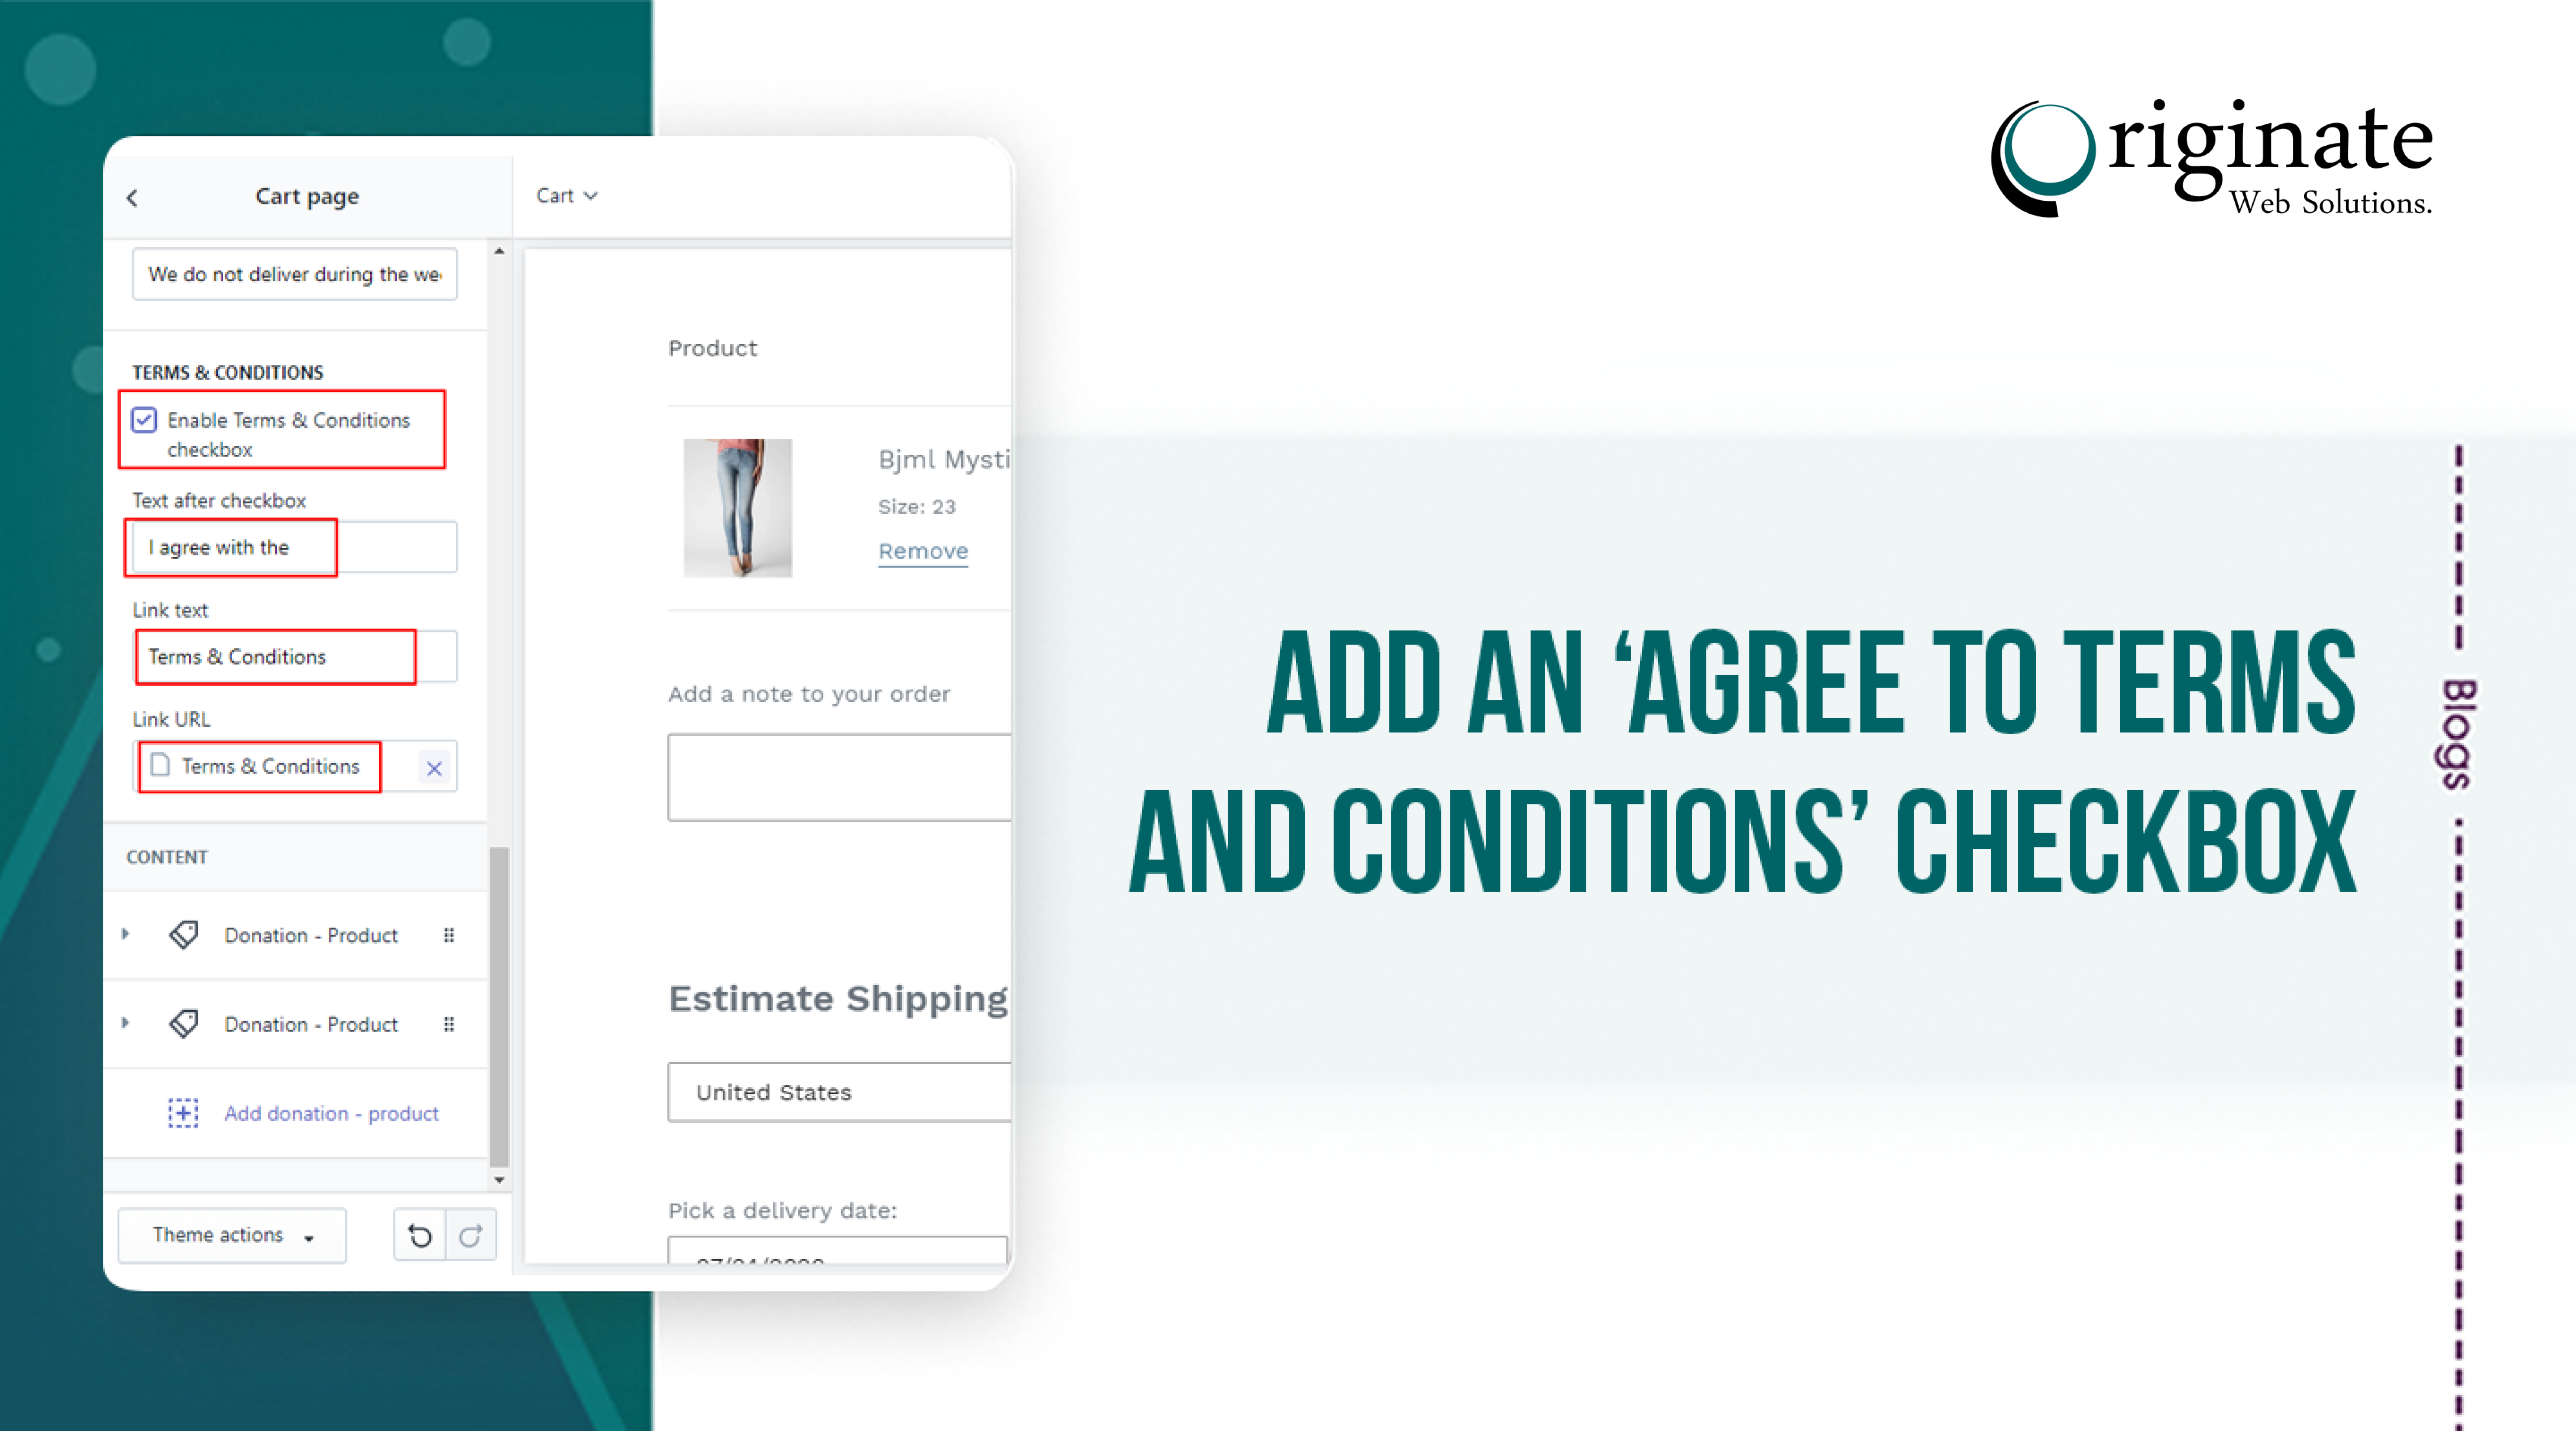
Now you can add terms & conditions checkbox in your cart page and also customize it from your store dashboard. If you enable it then you must need to check the checkbox otherwise an alert pop up will prevent them from continuing.
Note: It can only be added to the cart page, not possible to the checkout page!
Editing your theme code to add Terms & Condition checkbox this feature
Steps
- In the Section directory, find a file named main-cart-footer.liquid and locate below code –
<button type="submit" id="checkout" class="cart__checkout-button button" name="checkout"{% if cart == empty %} disabled{% endif %} form="cart">
  {{ 'sections.cart.checkout' | t }}
</button>
- Then add the following code right above this code:
{% comment %} terms and conditions checkbox {% endcomment %}
{% if section.settings.enable_tc_checkbox %}
  <div style="width:100%; text-align: right; display:block;  margin: 10px 0;">
    <input style="float:none; vertical-align: middle;" type="checkbox" id="agree" />
    <label style="display:inline; float:none" for="agree">
      {{ section.settings.tc_text }} <a style="text-decoration:underline" href="{{ section.settings.tc_link }}">{{ section.settings.tc_link_text }}</a>.
    </label>
  </div>
{% endif %}
{% comment %} end terms and conditions checkbox {% endcomment %}
- Then add id=”btn__checkout” to checkout button like this:
<button id="btn__checkout" type="submit" id="checkout" class="cart__checkout-button button" name="checkout"{% if cart == empty %} disabled{% endif %} form="cart">
  {{ 'sections.cart.checkout' | t }}
</button>
- Now it’s time to edit your {% schema %} to manage it from your store theme section. Add the following code in the settings of {% schema %} :
 "settings": [
    {
      "type": "checkbox",
      "id": "enable_tc_checkbox",
      "label": "Enable Terms & Conditions checkbox",
      "default": true
    },
    {
      "type": "text",
      "id": "tc_text",
      "label": "Text after checkbox",
      "default": "I agree with the "
    },
    {
      "type": "text",
      "id": "tc_link_text",
      "label": "Link text",
      "default": "Terms & Conditions"
    },
    {
      "type": "url",
      "id": "tc_link",
      "label": "Link URL"
    }
  ],
- Now move to the asset directory and find cart.js file. At the end of this file, add the following code –
// Terms & Conditions checkbox at the cart
var checkout = document.getElementById("btn__checkout");
var agree = document.getElementById("agree");
checkout.addEventListener("click", function(e){
  if(!agree.checked){
    alert("You must agree with the terms and conditions of sales to check out.");
    e.preventDefault();
  }
});
- Your checkbox will show beside your checkout button. If you want to put it above the button then go to Asset > component-cart.css and remove the below code:
.cart__ctas {
    display: flex;
    gap: 1rem;
 }